DIY Process For Roland W‑30 Jog Wheels
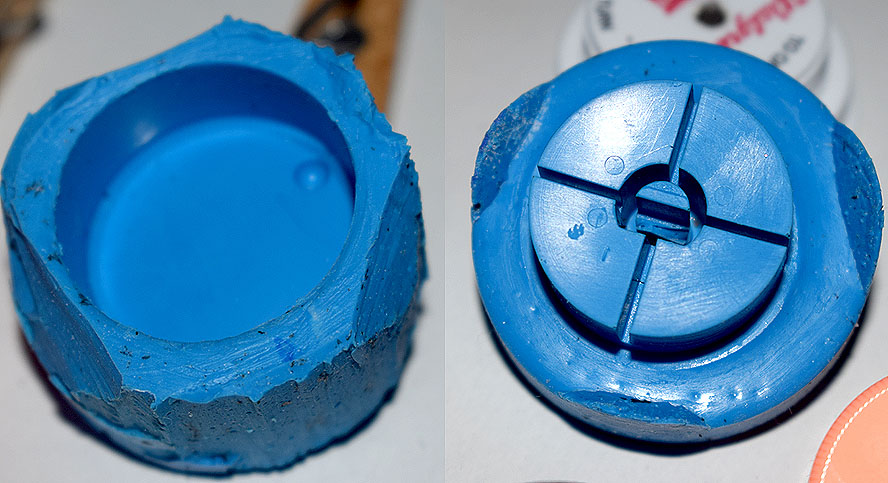 Top & Bottom Plat 55 Silicone Rubber Molds |
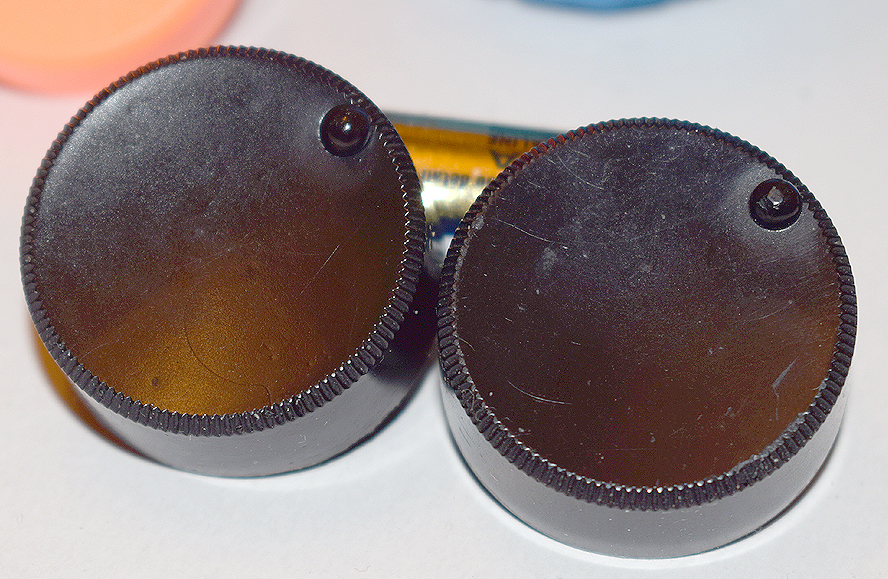
Polymeric Resin Copy Original
(click for larger image)
(click for larger image)
Note: I originally started this project to make replacement wheels for my own W‑30 sampler and maybe make some extra money on the side. It turns out that it's an extremely expensive and time consuming process so after making a few replacement wheels, I have abandoned this project. The process works extremely well but it requires a LOT of time and patience. If you want new W‑30 wheels, my advice would be to just buy some of those shown on the preceding page (Solid Aluminum, Eagle "Stealth" or Boss‑style)
The Process
This mold and resin casting method is a way to duplicate hard to find synth parts. Even if you have a synth part which is broken, provided you have all the pieces for it, you can still make a new one. If you've lost a part... beg borrow or steal one. If you steal one, copy it and you can always put the original back without guilt
I took a pair of original W‑30 jog wheels and used a product made by Alumilite to create flexible silicone rubber molds. I used two other Alumilite products (polymeric resin + dye) and poured this solution into the molds to make duplicate jog wheels. The wheels look impressive and are nice and shiny. A demo video showing the Alumilite mold and casting process is here. Note: Mute the irritating and repetitive background music. Barf!
After the parts are cast in resin, they harden and can be removed from the mold after 24 hours. However, the recommended curing time is 72 hours. I keep them in the mold for three days to prevent any accidental shape changes because they are still slightly pliable after a day or two. After three days, they are rock solid
I've been experimenting with Transparent Blotter Acid. What I mean is, I just bought a different type of resin so now I can make transparent custom jog wheels using blotter acid tabs, electronic parts, coins, beads, glow‑in‑the‑dark phosphorescent powder... anything ;^)
The Alumilite products I use to make the standard Black, White, and Color wheels are:
- Plat 55 Silicone Mold Making Rubber (410 Grams Of Rubber Compound + 45 Grams Of Catalyst)
- Dye (1 oz. Bottle)
- White Amazing Casting Resin (8 oz. Bottle Of Resin Compound + 8 oz. Bottle Of Catalyst)
- For Transparent Wheels: Clear Casting Resin (8 oz. Bottle Of Resin Compound + 8 oz. Bottle Of Catalyst)
Tips And Tricks
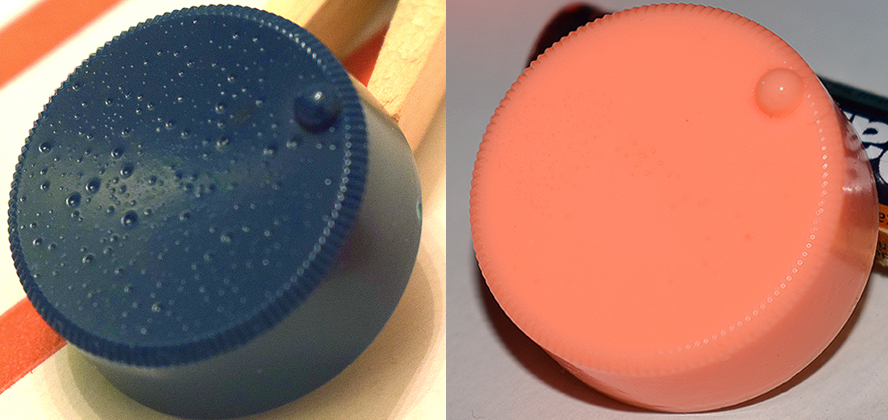
Disaster: Bubbles Failure Fluorescent Glow Orange
(click for larger image)
(click for larger image)
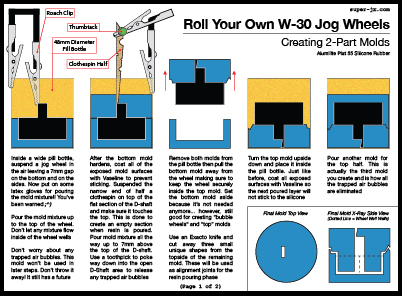
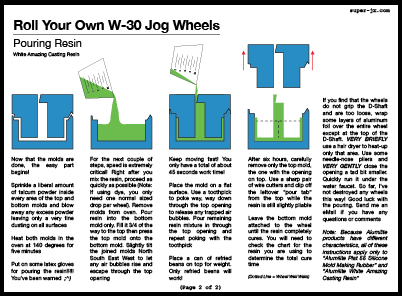
When creating the mold, it needs to be made in three parts. It's actually two parts, but one of the molds is only used to create another mold. After creating the bottom half of the mold, a duplicate mold needs to be made which needs to be turned upside down and then another mold is poured for the the top half. This is actually the third mold you create. Confusing, I know but this is how I was able to eliminate the disaster with the trapped air bubbles. The secret to eliminating bubbles is to cast the mold so the top of the wheel faces up instead. The bubbles in the prototypes were trapped in the curvature at the top of the wheel when it was cast upside down. The final molds turned out perfect. I've put together a detailed mold making and resin pouring guide here
Stellar! It's nearly impossible to tell a duplicate from the original. After several weeks of use, the wheels seems quite durable. Will the wheels go south after a few years of use... who knows? If they do, I can always make duplicates! This casting process works great for this size wheel but I don't think smaller parts would work well such as small slider knobs, buttons, power switches, etc... The reason is because it would be very difficult to create and work with such a small mold
Roland W‑30 Replacement Jog Wheels and Replacement Rotary Encoders info at this link
The Information On This Page Is Current As Of