
AC Power Fuse Reference For Roland Synths & Samplers
(117V SYSTEMS ONLY)
v20250523
Every synth and sampler DIY'er needs to keep a couple of extra fuses handy for the times a screw is accidentally dropped inside the case or when a Floppy Disk Drive is plugged in backwards. Poooof! There goes the fuse and there are none in your spare parts kit. This is a useful list of the most common fuses used on a few Roland synths and samplers for 117V systems only. All fuses are glass cartridge, measure 5 mm x 20 mm and look similar to the fuses shown below

| ▶ ▶ ▶ ALWAYS UNPLUG THE SYNTH OR SAMPLER FROM THE POWER SOURCE BEFORE REPLACING A FUSE ◀◀ ◀ | ||||||||
| ▽ ▽ ▽ 117V SYSTEMS ONLY ▽ ▽ ▽ | ||||||||
SYNTH / SAMPLER |
AMPERAGE |
VOLTAGE RATING |
FUSE TYPE |
PCB SILKSCREEN |
REPLACEMENT SOURCE |
|||
| ALPHA JUNO‑1 / JUNO‑2 HS‑10 | 300mA | 250V | Fast Blow | F1 (Fuse Board) | Littelfuse P/N: 0235.300HXP | |||
| CD-5 (Two Power Fuses!) | 2A
1.6A |
125V
250V |
Fast Blow
Slow Blow |
F101 (Power Supply Board)
F102 (Power Supply Board) |
Littelfuse P/N: 0217002.MXP
Littelfuse P/N: 021801.6MXP |
|||
| D-10 (Two Power Fuses!) | 2.5A
400mA |
250V
250V |
Slow Blow
Slow Blow |
F1 (Power Supply Board)
F1 (Fuse Board) |
Littelfuse P/N: 021302.5MXP
Littelfuse P/N: 0239.400MXP |
|||
| JX-10 | 1.25A | 125V | Slow Blow | F1 (Power Supply Board) | Littelfuse P/N: 02181.25MXP | |||
| MKS-50 (Two Power Fuses!) | 200mA
1A |
250V
250V |
Slow Blow
Fast Blow |
F1 (Fuse Board)
F1 (Main Board) |
Littelfuse P/N: 0239.200MXP
Littelfuse P/N: 0217001.MXP |
|||
| MKS-70 S-50 | 630mA | 250V | Slow Blow | F1 (Filter Board) | Littelfuse P/N: 0618.630MXP | |||
| S-550 (Two Power Fuses!) | 5A
4A |
125V | Fast Blow
Slow Blow |
FUSE 1 (Power SW Board)
F3 (Power Supply Board) |
Littelfuse P/N: 0235005.MXP
Littelfuse P/N: 0239004.MXP |
|||
| S‑330 S‑750 W‑30 | 1.25A | 125V | Fast Blow | F1 (TDK PSU Board) | Littelfuse P/N: 02171.25MXP | |||
| S-760 (Two Power Fuses!)
Note: 1.5A fuse is for the SCSI port |
1.25A
1.5A |
125V
125V |
Fast Blow
Fast Blow |
F1 (TDK PSU Board)
F1 (Main Board) |
Littelfuse P/N: 02171.25MXP
Bel Fuse P/N: 5MF 1.5-R |
|||
| SP-700 (Two Power Fuses!)
Note: 1.5A fuse is for the SCSI port |
1.25A
1.5A |
125V
125V |
Fast Blow
Fast Blow |
F1 (TDK PSU Board)
F1 (Main Board) |
Littelfuse P/N: 02171.25MXP
Bel Fuse P/N: 5MF 1.5-R |
|||
SYNTH / SAMPLER |
AMPERAGE |
VOLTAGE RATING |
FUSE TYPE |
PCB SILKSCREEN |
REPLACEMENT SOURCE |
|||
| △ △ △ 117V SYSTEMS ONLY △ △ △ | ||||||||
|
I have opened up all six of these synths and have been unable to find a fuse anywhere inside!!!
Also, there are no fuses to be found on the schematics for these six synths I'm just guessing a fuse is sealed inside the power transformer making this part a "throw‑away" item |
|||||||

NOTES:
You can always replace a 125V fuse with a 250V fuse of equal Amperage as long as the application voltage is 250V or less However, the reverse is not true. You can't replace a 250V fuse with a 125V fuse of equal amperage if the application voltage exceeds the 125V |
||||||||
Miscellaneous Fuses

PICO® Fuse Resistor
- S‑550 / S‑330 / S‑750 / S‑770
- In addition to AC Power fuses, the Roland S‑550, S‑330, S‑750 and S‑770 have one (or more) small PICO® fuses which protect the sampler from any short circuits or current overloads on the EXT CTRL 9‑pin port (Mouse or RC‑100) and the DIGITAL RGB 8‑pin port (Video). If you have a non‑working Mouse, non‑working RC‑100 Controller or no video output, see the PICO® fuse replacement info at this link for some repair tips
- S‑760
- This sampler also has a small PICO® fuse and is installed on the OP‑760‑1 Video Expansion Board. It's there to protect any short circuits or current overloads on the DIGITAL RGB connector and is connected in‑between Pin‑1 of the DIN‑8 connector and Vcc. The silkscreen location is FUSE1 on the lower OP‑760‑1 Video Board. This PICO® fuse is identical to the one used on the S‑550, S‑330, S‑750 and S‑770. To my knowledge, there is no fuse protection used on the S‑760's EXT CTRL 9‑pin port
- S‑50
- I see no fuses of any kind on the S‑50 schematics for protection to the EXT CTRL 9‑pin port or the DIN‑8 digital RGB connector sooooooo... tread lightly when plugging external devices into these ports

- I see no fuses of any kind on the S‑50 schematics for protection to the EXT CTRL 9‑pin port or the DIN‑8 digital RGB connector sooooooo... tread lightly when plugging external devices into these ports
Fusible Resistor
Roland synths such as the JV‑880, U‑220 and others have a fusible resistor connected to the LCD circuit. If you monkey around with changing out the LCD, a crossed wire will blow this component. A fusible resistor serves dual functions. When the power isn't exceeded, it serves as a current limiting resistor. When the power rating is exceeded, it functions as a fuse, burns up, and becomes an open in the circuit to protect components from excess current. I've blown‑up a few of these while trying to retrofit new LCD's on my synths when I crossed some wires. Replacement is easy but you will need to solder these in place very carefully.
 Unlike a normal resistor, these are easily destroyed if you keep the soldering tip on it for more than 3 seconds. This fusible resistor is at silkscreen location R116 on the JV‑880 Main PCB and at silkscreen location R35 on the U‑220 Main PCB. This special replacement part is the same for both synths. It's a 1/2W, 8.2Ω fusible resistor (Vishay P/N: NFR25H0008208JA500) and is available at mouser.com
▶ SPECIAL NOTE: If you replace a PICO fuse or a fusible resistor, take extra care to observe how Roland installed it! This component sits far above the PCB and away from other components, about 25mm. This is on purpose so that if this fuse does blow, it won't scorch other nearby components or traces on the PCB from the excess heat it generates during failure. Since this is a "Fast Blow" fuse, use a heatsink when soldering it in place. Use a slightly lower than normal soldering temperature (less than 300℃ / 572℉) and don't let the soldering iron make contact for more than three seconds at a time. Otherwise, the performance may be deteriorated or the fuse may open
|
Other Synthesizer And Sampler Homepages I Maintain 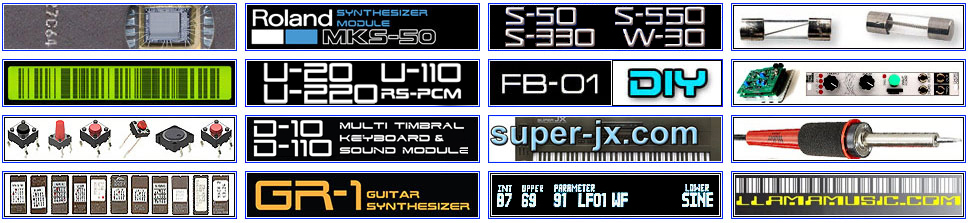
|
 I think this topic is important enough to place on all my synth and sampler INFO webpages I think this topic is important enough to place on all my synth and sampler INFO webpages
 |
| If you find some of this DIY info useful, please consider donating a small amount. All donations are used for future DIY synth and sampler development. Thanks! | 
|
Safety Precautions
Modifications made to any factory stock equipment will always pose an element of risk. Sometimes mistakes are made which are irreversible. Improper soldering and handling of electricity can cause serious injury and damage the synthesizer. Use caution when handling static sensitive devices and the PCB. Make sure you are properly grounded, working on a static‑free workbench or table and wearing eye protection during any soldering tasks. The author is not responsible for any damage or injury resulting from this DIY info. Use this DIY information at your own risk. And, I can't stress enough, the importance of wearing eye protection while soldering. That stuff flies everywhere sometimes!
Modifications made to any factory stock equipment will always pose an element of risk. Sometimes mistakes are made which are irreversible. Improper soldering and handling of electricity can cause serious injury and damage the synthesizer. Use caution when handling static sensitive devices and the PCB. Make sure you are properly grounded, working on a static‑free workbench or table and wearing eye protection during any soldering tasks. The author is not responsible for any damage or injury resulting from this DIY info. Use this DIY information at your own risk. And, I can't stress enough, the importance of wearing eye protection while soldering. That stuff flies everywhere sometimes!
All images, text, JavaScript and HTML Code ©1995- by llamamusic.com
The Information On This Page Is Current As Of
The Information On This Page Is Current As Of

WEBSITE DISCLAIMER
Last updated October 31, 2014
1) You may not copy, reproduce, republish, disassemble, decompile, reverse engineer, post, make available to the public, or otherwise use the content of this website (including all software applications, scripts, webpages, design elements, and graphics) for commercial gain in any way
2) By using the llamamusic.com website and its services you agree to be bound by these terms, which shall take effect immediately on your first use of this website. You may not use llamamusic.com services if you do not accept the terms. If you do not agree to be bound by all of the following terms please do not access and use llamamusic.com. llamamusic.com reserves rights to block violators of these terms from using its services or restrict their access in any form at any time
3) You agree that lawful owners of llamamusic.com own all legal right, title, copyrights, design rights, and other intellectual property rights (registered and unregistered) in this website and all content (including all software applications) located on the site
4) llamamusic.com website content and services are provided "AS IS" and on an "AS AVAILABLE" basis. To the extent permitted by law, llamamusic.com excludes all representations and warranties (whether express or implied by law), including the implied warranties of satisfactory quality, fitness for a particular purpose, non‑infringement, compatibility, security, and accuracy. llamamusic.com does not guarantee the accuracy, completeness, or performance of the website or any of the content and services. While we try to ensure that all functionality provided is correct, no responsibility is accepted by or on behalf of llamamusic.com for any errors or inaccurate content on the website
5) llamamusic.com shall not be liable for any of the following losses or damage (whether such damage or losses were foreseen, foreseeable, known, or otherwise): (a) loss of data; (b) loss of revenue or anticipated profits; (c) loss of business; (d) loss of opportunity; (e) loss of goodwill or injury to reputation; (f) losses suffered by third parties; or (g) any indirect, consequential, special or exemplary damages arising from the use of llamamusic.com and its services regardless of the form of action
6) You agree to use this website only for lawful purposes, and in a way that does not infringe the rights of, restrict or inhibit anyone else’s use of llamamusic.com
7) The information provided by llamamusic.com ("we," "us," or "our") on llamamusic.com (the "Site") is for general informational purposes only. All information on the Site is provided in good faith, however we make no representation or warranty of any kind, express or implied, regarding the accuracy, adequacy, validity, reliability, availability, or completeness of any information on the Site. UNDER NO CIRCUMSTANCE SHALL WE HAVE ANY LIABILITY TO YOU FOR ANY LOSS OR DAMAGE OF ANY KIND INCURRED AS A RESULT OF THE USE OF THE SITE OR RELIANCE ON ANY INFORMATION PROVIDED ON THE SITE. YOUR USE OF THE SITE AND YOUR RELIANCE ON ANY INFORMATION ON THE SITE IS SOLELY AT YOUR OWN RISK
EXTERNAL LINKS DISCLAIMER
The Site may contain (or you may be sent through the Site) links to other websites or content belonging to or originating from third parties or links to websites and features in banners or other advertising. Such external links are not investigated, monitored, or checked for accuracy, adequacy, validity, reliability, availability, or completeness by us. WE DO NOT WARRANT, ENDORSE, GUARANTEE, OR ASSUME RESPONSIBILITY FOR THE ACCURACY OR RELIABILITY OF ANY INFORMATION OFFERED BY THIRD‑PARTY WEBSITES LINKED THROUGH THE SITE OR ANY WEBSITE OR FEATURE LINKED IN ANY BANNER OR OTHER ADVERTISING. WE WILL NOT BE A PARTY TO OR IN ANY WAY BE RESPONSIBLE FOR MONITORING ANY TRANSACTION BETWEEN YOU AND THIRD‑PARTY PROVIDERS OF PRODUCTS OR SERVICES
AFFILIATES DISCLAIMER
The Site may contain links to affiliate websites. Our affiliates include the following:
• supersynthprojects.com • vecoven.com • super-jx.com
